Sunday, December 21, 2014

Reverse Engineering of human part replacement parts. (on your knee)

Assalamualaikum and good day everyone.

Reverse engineering, 3d printing, additive engineering is now getting more popular then few years before. This is because everyone is now going so fast and need decision to be more faster than ever. Here i place some sample on about Reverse Engineering of a replacement part that can be installed to our knee. This is not 100% accurate (and yet not less than 80 %)> Done it with catia v5 Reverse Engineering. 

To do this you need to have scanned data, that means cloud of points will be your starting lane. Then, with those cloud of points you will need to do meshing, thats why colours are in brown as in the picture below.
Next, with Quick Surface Reconstruction workbench, we need to locate the basic surface first to ease the surfacing. Then, with other advance icon in the workbench, complicated surfaces is then work to complete the design as below.

For those which are newbie to this, as we can see below the colour of yellow and brown are overlapping each other. That what we need as a visual inspection, we know that our surfacing is almost the same with the scanned surfaces.


Friday, November 7, 2014

Our reader: Krishna passed the Specialist Exam for CATIA

Salam.

Congratulations to Our blog reader, Krishna as he passed his CATIA Specialist Exam last week. Hopefully there will be many more from us, CATIA user, that will sit and pass this exam in the future.

Anyway, here is his comments on one of my post.

Again, congrats and thanks for your credit to me :)

*******************************************************************************

Hi Guys day before yesterday i have done the Catia Surface Design specialist (R18) exam and I am passed the exam . Firstly , i would like to pass my thanks to Mr . Zihad mahmud and for his exam experience really helped me to crack down the exam in 20 Days time .

For me it was difficult to find the right material earlier to prepare for the exam . I have given a lot research on material , finally god helped me through CATIA Online Documentation of R18 and installed CATIA V5 R18 .

You are right , the questions are tricky but not tough . From my experience while picking the answers , one should not pick in the first instance instead should go for an extra thought . Because it appears for each question more than one answers would be the obvious choices .

I have faced a variety of questions . Covered all topics in the DS syllabus .
The only material which i have prepared is CATIA online documentation and CATIA on my PC .

Actually , one should need to understand the real mechanism and characteristics of ICONS and applications .

Overall , i am satisfied with my exam experience and result . I do not have practical work experience on CATIA but i have made it possible . 

*****************************************************************************************************************************************************************
http://mycatiav5.blogspot.com/2010/03/catia-v5r18-specialist.html

Thursday, May 22, 2014

#CATIA 101 Part Design

A basic tutorial regarding catia part design intended to be use as describe below.

Program: 5th Product Design and Development 2014 (5th PDDW 2014)
Students : KISMEC, Kedah, Malaysia.
Date: 2/6/2014, 1400 hrs - 1600 hrs


Tuesday, April 15, 2014

#2 CATIA 101 Basic To set the measurement parameter


Assalamualaikum and Good Day everyone,

This tutorial is about how to change the units and parameters such as the length, weight into desired parameter such as inch or mm with CATIA V5. Do learn this and it might safe your time on how to change the parameters as we need in our drawing.

Tuesday, April 1, 2014

#1 CATIA 101 Basic (Settings) : To turn the workbenches tools to standard view

Assalamualaikum,

Good Day everyone,


Have you ever wonder, why your classmates, your workmates getting more and more in use with catia software and you are now still searching on how to get use to the software? And still searching in the internet on which is the best shortcut to pass the catia test, or to complete any task given?


The secret is here. In this post, i have made a tutorial that is done by others soon after they start their catia software early in the morning. That is on 'How To Turn The Workbenches Tools to Standards View'. This is a simple step that usually most of us skipped (as it is in the first chapter of any catia tutorial) . But it is truly important as we will get in used of this time by time with its standard view.


The concept is, if we are used with the standard view, that we can make work faster by searching icons that are eyes are used for such as in Sketcher Workbench, Sketch Icon is at the Top Right Corner of the Screen, as we have remembered time by time we used the software. Eventually, if someone have used our workstation or worse it is publicily shared workstation, most of us will have those tools scattered as we want to find tools icon that are usually hiding in the worjbenches. This scattered icon will not be in standard position again otherwise we make it to be in standard position again. Thus, it will be hard for us to find the icons. And it will slow down our work as we are trying to get used on the new positioned that are last used by our friend.


So, what to wait? Watch this video tutorial, (its only 2 minutes and 10 seconds), and learn how to make the tools in standard position. This will reduce the time of 'time to get used to a new icons position', and faster your work progress time by time.


Enjoy.


wassalam.

#prayformh370


Thursday, March 27, 2014


There will always a hope...
9M-MRO

Wednesday, March 19, 2014

#13 Sukhoi 29 Finishing HD


This is about finishing of the SU 29. Dont forget to watch the full video to complete your tutorial about to build the su29 with catia V5.


Good luck and have a nice catia day !

Monday, February 10, 2014

#8 Sukhoi 29 BuildingVertical Tail & Rudder HD


This video tutorial is about using CATIA V5 workbench that is mostly wireframe and surface design to do reverse engineering project on theVertical Tail and the Rudder. Quit a lot of changing views from top, front and side to have the design equal to the plan. For those who have completed the wings and fuselage sections, this is the easier part.

#7 Sukhoi 29 Building Horizontal Stabilizer & Elevator HD


This video tutorial is about using CATIA V5 workbench that is mostly wireframe and surface design to do reverse engineering project on the Horizontal Stabilzer and Elevator. Quit a lot of changing views from top, front and side to have the design equal to the plan. For those who have completed the wings and fuselage sections, this is the easier part.

#6 Sukhoi 29 Building Main Wing & Aileron HD


Assalamualaikum and Good Day,


This video is about the steps on reverse engineering of the Main Wing and the Aileron of the Sukhoi 29 in Wireframe and Surface Design. The workbench uses Wireframe and Surface Design most.

#5 Sukhoi 29 Building Main Wing HD


Continue on building the fuselage of the su 29 and also start the main wing design process

#4 Sukhoi 29 Building Fuselage 2 HD

#3 Sukhoi 29 Building Fuselage HD

#2 Sukhoi 29 Placing cross section on planes HD


Assalamualaikum


As promised this is the second video on sukhoi 29 tutorial. We started with the fuselage sections from the front to the aft. Placing the pictures of the 3 view plan along the fuselage. Learn how to crop pictures from Microsoft Picture Manager and what type of file that can be associated with CATIA V5. And also this video shows on how to change the parameters in STICKERS. have you learn about stickers yet? If not, feel free to watch the video.


Thanks


Wassalam

#1 Sukhoi 29 Placing pictures on planes HD


Assalamualaikum,


Today i want to show to you how i ve done the SUKHOI 29. This is the first video for 2014. InsyaALLAH, will upload everyday for the next video tutorial. Make sure you follow our blog so that you wont miss the video tutorial.


Or you can watch from our youtube channel.


Thanks all.

Sunday, January 19, 2014

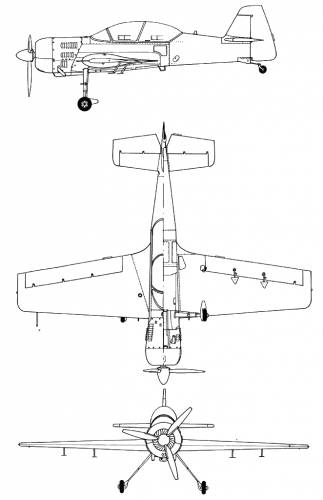
Sukhoi 29, 3 Plan view Reverse Engineering

Assalamualaikum and good day to all,

How are you today? Still on your workstation and doing your CAD work or minggling aound with your smart phone looking for something new in the net?

As yesterday, i woke up early in the morning, around 4 am, and its still dark here in malaysia as the sunrise on 7 am. So, i turned on catia, and might be do some work that morning. This is the perfect time to start catia work as two of my sons and their mother is still comfortably sleeping in their bed.

Open up GOOGLE CHROME. Search for Sukhoi 29. Cropping the side, top and front view, and finished the reverse engineering on sukhoi 29 around 3 hours. The pictures will not be found in the catia in PNG. But it will work well on jpg as i done it in this task.


I love this airplane as i have it on my table, not the real airplane, but a radio control plane. Have flown it for couple of tries and yet it is flying lovely as she looks. It has a symmetrical airfoil, mid wing, a big size of aileron, elevator and rudder. It also have a large surface of wing, horizontal and vertical stabilizer too. It also have quit a big spinner in front of its huge engine cowling. It also have a small landing gear on its back.


Interesting facts about this SUKHOI 29
http://www.russianaeros.com/su29product.htm


The Sukhoi Su-29 is a two seat aircraft, which, when flown solo, has the capability of winning a World Championship, yet also being suitable for aerobatic training, and even touring, having a range of up to 1,400kms!By virtue of having a composite fuselage, the Su-29 only weighs some 40kg more than the Su-26, and when flown solo, the performance is virtually identical, although it is somewhat heavier on the controls.
  1. The aim in the design of the Su-29 was to have an aircraftthat had the aerobatic capability when flown solo of the SU-26/SU-31 while having a second seat thus dramatically increasing the usefulness of the aircraft.
  2. Inevitably, the greater weight and size of the aircraft makes it a little less agile than the single seaters, but two-seat Su-29 have been competing with great success at a huge variety of aerobatic competitions – even up to World Championship level.
  3. Mechanically, the Su-29 is similar to all the other Sukhois, with a high tensile stainless-steel forward fuselage, while the rear fuselage, tail and the entire wing structure is composite.  Again, it shares the single seaters extraordinary strength – the aircraft is cleared for   
  4. +12/-10G at maximum aerobatic weight and with five wings having been deliberately broken in tests, the minimum that one has failed at has been at 23.5G!

  5. The Su-29 is in full production and approximately 64 aircraft have been made to date.  Sales have been made to most countries in theWest, but also to South Africa, Australia; Brazil; Indonesia; the Middle East; Mexico and as well as eight aircraft for the Argentine Airforce.
    Performance
  •   Length                       24.0 ft
  • Wingspan                   27 ft
  • Engine (radial)           360 or 400 hp
  • Empty weight             1720 lbs
  • Max gross weight       2700 lbs
  • G limits                        +12/-10G
  • Spar factory test        ±23G
  • Roll rate                      360º sec
  • Rate of climb             3,350 fpm
  • Max cruise speed     183 mph
  • Stall speed                 71 mph
  • Vne                              273 mph
  • Takeoff run @            165 yards

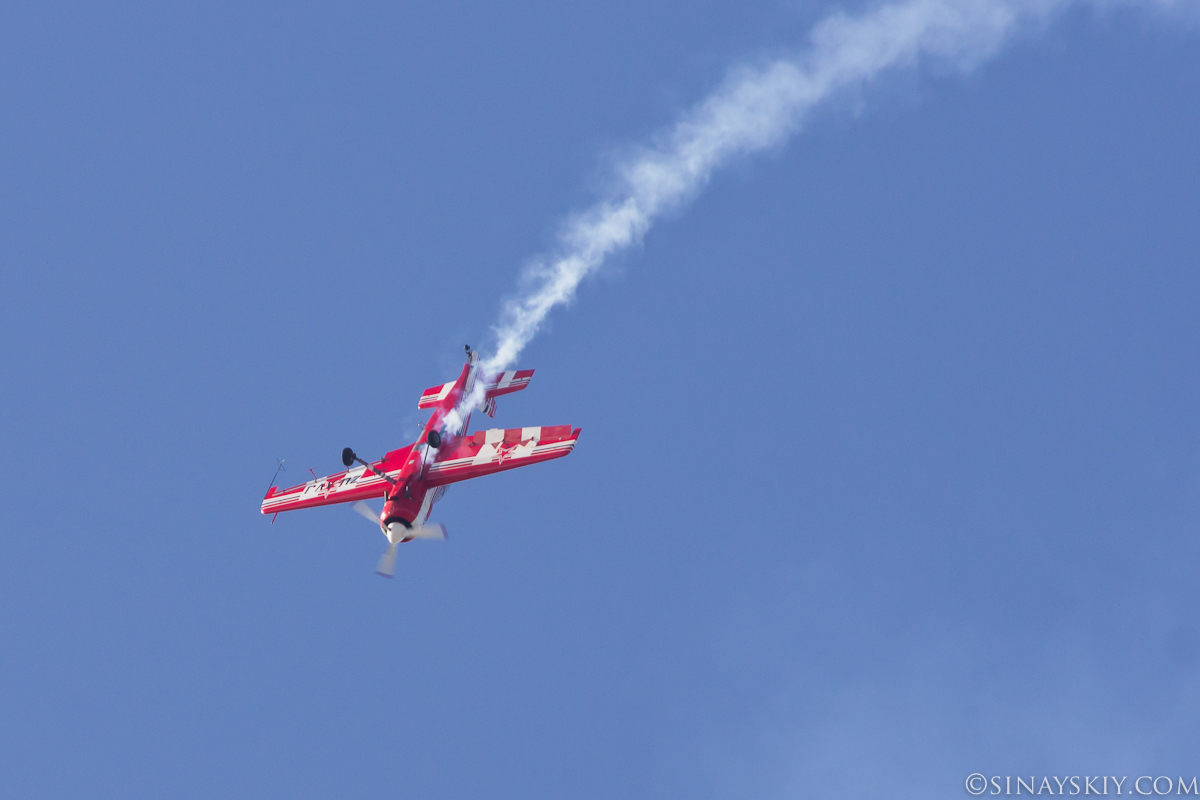
These are the SU 29 airplane pictures.


The most popular inverted flight.


Red Sukhoi 29 is doing loop sky high.


The pilot open up his canopy and waving hand to the spectators. And later the person behind throwing up leaflets. This happen on 2005 at moscow. You can watch other spectacular pictures here


And i also have done the CATIA REVERSE ENGINEERING on SUKHOI 29 as in pictures below. Feel free to comments on my comments on the bottom of this page.


Learn how to do this in CATIA, click HERE to go to the first tutorial on building Sukhoi 29.