Showing posts with label reverse engineering. Show all posts
Showing posts with label reverse engineering. Show all posts
Monday, February 10, 2014
#8 Sukhoi 29 BuildingVertical Tail & Rudder HD
This video tutorial is about using CATIA V5 workbench that is mostly wireframe and surface design to do reverse engineering project on theVertical Tail and the Rudder. Quit a lot of changing views from top, front and side to have the design equal to the plan. For those who have completed the wings and fuselage sections, this is the easier part.
#7 Sukhoi 29 Building Horizontal Stabilizer & Elevator HD
This video tutorial is about using CATIA V5 workbench that is mostly wireframe and surface design to do reverse engineering project on the Horizontal Stabilzer and Elevator. Quit a lot of changing views from top, front and side to have the design equal to the plan. For those who have completed the wings and fuselage sections, this is the easier part.
#6 Sukhoi 29 Building Main Wing & Aileron HD
Assalamualaikum and Good Day,
This video is about the steps on reverse engineering of the Main Wing and the Aileron of the Sukhoi 29 in Wireframe and Surface Design. The workbench uses Wireframe and Surface Design most.
#5 Sukhoi 29 Building Main Wing HD
Continue on building the fuselage of the su 29 and also start the main wing design process
#2 Sukhoi 29 Placing cross section on planes HD
Assalamualaikum
As promised this is the second video on sukhoi 29 tutorial. We started with the fuselage sections from the front to the aft. Placing the pictures of the 3 view plan along the fuselage. Learn how to crop pictures from Microsoft Picture Manager and what type of file that can be associated with CATIA V5. And also this video shows on how to change the parameters in STICKERS. have you learn about stickers yet? If not, feel free to watch the video.
Thanks
Wassalam
#1 Sukhoi 29 Placing pictures on planes HD
Assalamualaikum,
Today i want to show to you how i ve done the SUKHOI 29. This is the first video for 2014. InsyaALLAH, will upload everyday for the next video tutorial. Make sure you follow our blog so that you wont miss the video tutorial.
Or you can watch from our youtube channel.
Thanks all.
Sunday, January 19, 2014
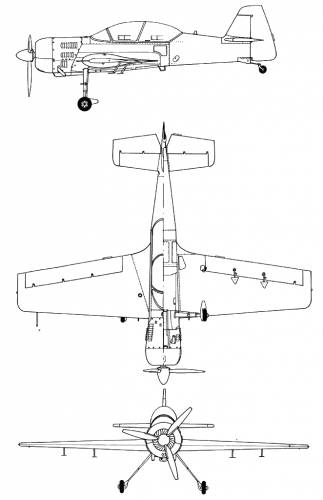
Sukhoi 29, 3 Plan view Reverse Engineering
Assalamualaikum and good day to all,
How are you today? Still on your workstation and doing your CAD work or minggling aound with your smart phone looking for something new in the net?
As yesterday, i woke up early in the morning, around 4 am, and its still dark here in malaysia as the sunrise on 7 am. So, i turned on catia, and might be do some work that morning. This is the perfect time to start catia work as two of my sons and their mother is still comfortably sleeping in their bed.
Open up GOOGLE CHROME. Search for Sukhoi 29. Cropping the side, top and front view, and finished the reverse engineering on sukhoi 29 around 3 hours. The pictures will not be found in the catia in PNG. But it will work well on jpg as i done it in this task.

I love this airplane as i have it on my table, not the real airplane, but a radio control plane. Have flown it for couple of tries and yet it is flying lovely as she looks. It has a symmetrical airfoil, mid wing, a big size of aileron, elevator and rudder. It also have a large surface of wing, horizontal and vertical stabilizer too. It also have quit a big spinner in front of its huge engine cowling. It also have a small landing gear on its back.

Interesting facts about this SUKHOI 29
http://www.russianaeros.com/su29product.htm

The Sukhoi Su-29 is a two seat aircraft, which, when flown solo, has the capability of winning a World Championship, yet also being suitable for aerobatic training, and even touring, having a range of up to 1,400kms!By virtue of having a composite fuselage, the Su-29 only weighs some 40kg more than the Su-26, and when flown solo, the performance is virtually identical, although it is somewhat heavier on the controls.
Performance
How are you today? Still on your workstation and doing your CAD work or minggling aound with your smart phone looking for something new in the net?
As yesterday, i woke up early in the morning, around 4 am, and its still dark here in malaysia as the sunrise on 7 am. So, i turned on catia, and might be do some work that morning. This is the perfect time to start catia work as two of my sons and their mother is still comfortably sleeping in their bed.
Open up GOOGLE CHROME. Search for Sukhoi 29. Cropping the side, top and front view, and finished the reverse engineering on sukhoi 29 around 3 hours. The pictures will not be found in the catia in PNG. But it will work well on jpg as i done it in this task.

Interesting facts about this SUKHOI 29
http://www.russianaeros.com/su29product.htm

The Sukhoi Su-29 is a two seat aircraft, which, when flown solo, has the capability of winning a World Championship, yet also being suitable for aerobatic training, and even touring, having a range of up to 1,400kms!By virtue of having a composite fuselage, the Su-29 only weighs some 40kg more than the Su-26, and when flown solo, the performance is virtually identical, although it is somewhat heavier on the controls.
- The aim in the design of the Su-29 was to have an aircraftthat had the aerobatic capability when flown solo of the SU-26/SU-31 while having a second seat thus dramatically increasing the usefulness of the aircraft.
- Inevitably, the greater weight and size of the aircraft makes it a little less agile than the single seaters, but two-seat Su-29 have been competing with great success at a huge variety of aerobatic competitions – even up to World Championship level.
- Mechanically, the Su-29 is similar to all the other Sukhois, with a high tensile stainless-steel forward fuselage, while the rear fuselage, tail and the entire wing structure is composite. Again, it shares the single seaters extraordinary strength – the aircraft is cleared for
- +12/-10G at maximum aerobatic weight and with five wings having been deliberately broken in tests, the minimum that one has failed at has been at 23.5G!
- The Su-29 is in full production and approximately 64 aircraft have been made to date. Sales have been made to most countries in theWest, but also to South Africa, Australia; Brazil; Indonesia; the Middle East; Mexico and as well as eight aircraft for the Argentine Airforce.
- Wingspan 27 ft
- Engine (radial) 360 or 400 hp
- Empty weight 1720 lbs
- Max gross weight 2700 lbs
- G limits +12/-10G
- Spar factory test ±23G
- Roll rate 360º sec
- Rate of climb 3,350 fpm
- Max cruise speed 183 mph
- Stall speed 71 mph
- Vne 273 mph
- Takeoff run @ 165 yards
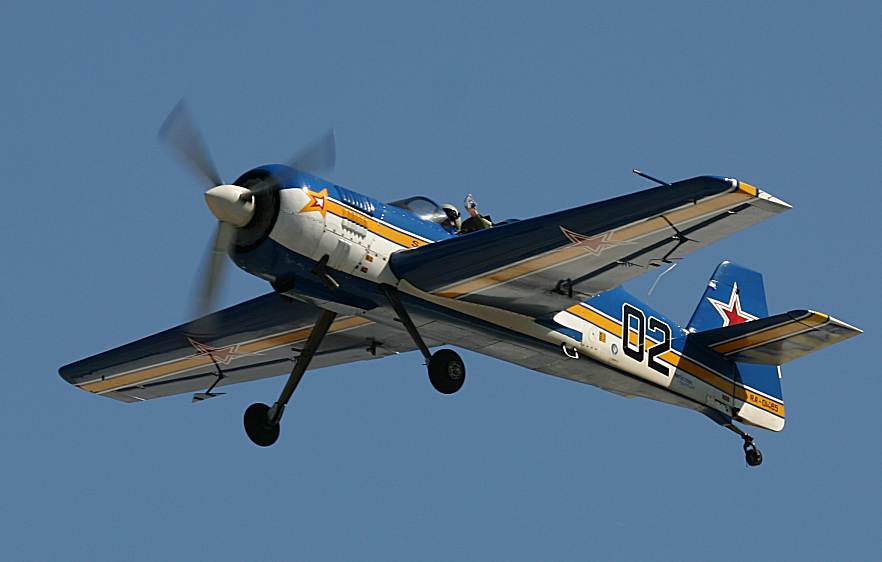
These are the SU 29 airplane pictures.


The most popular inverted flight.

Red Sukhoi 29 is doing loop sky high.
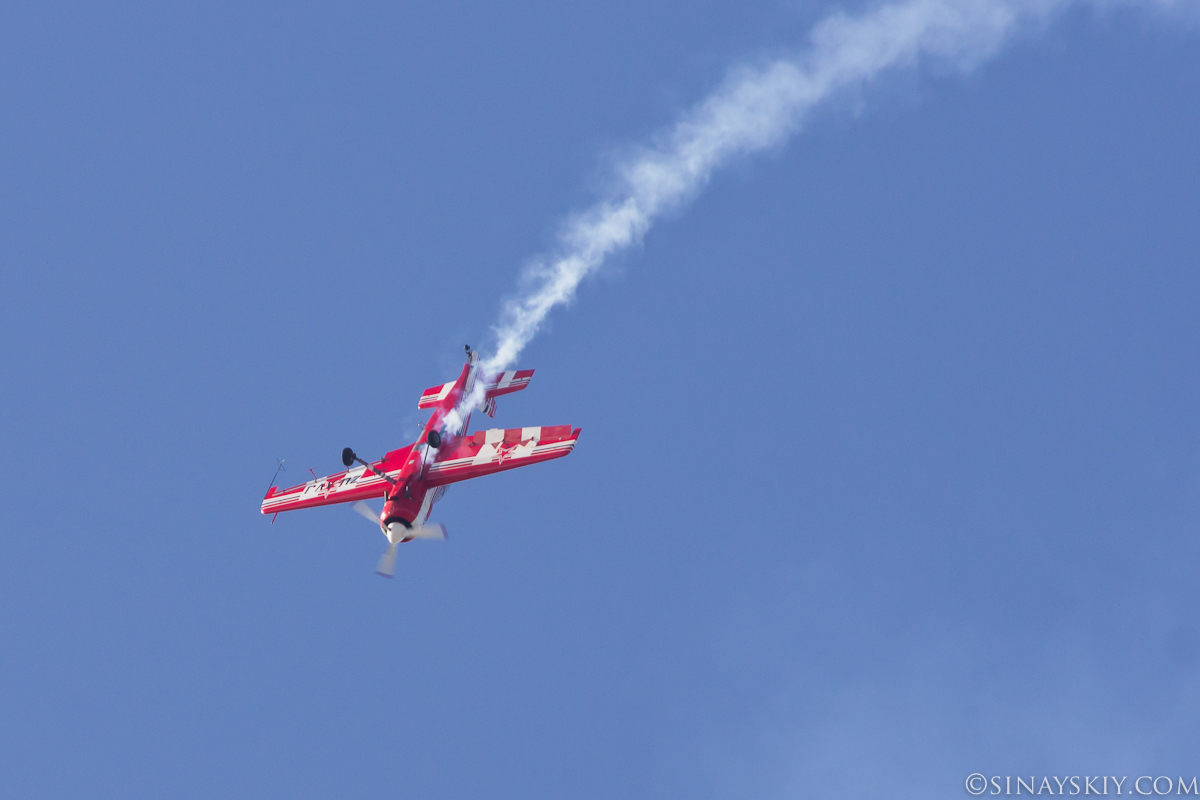
The pilot open up his canopy and waving hand to the spectators. And later the person behind throwing up leaflets. This happen on 2005 at moscow. You can watch other spectacular pictures here
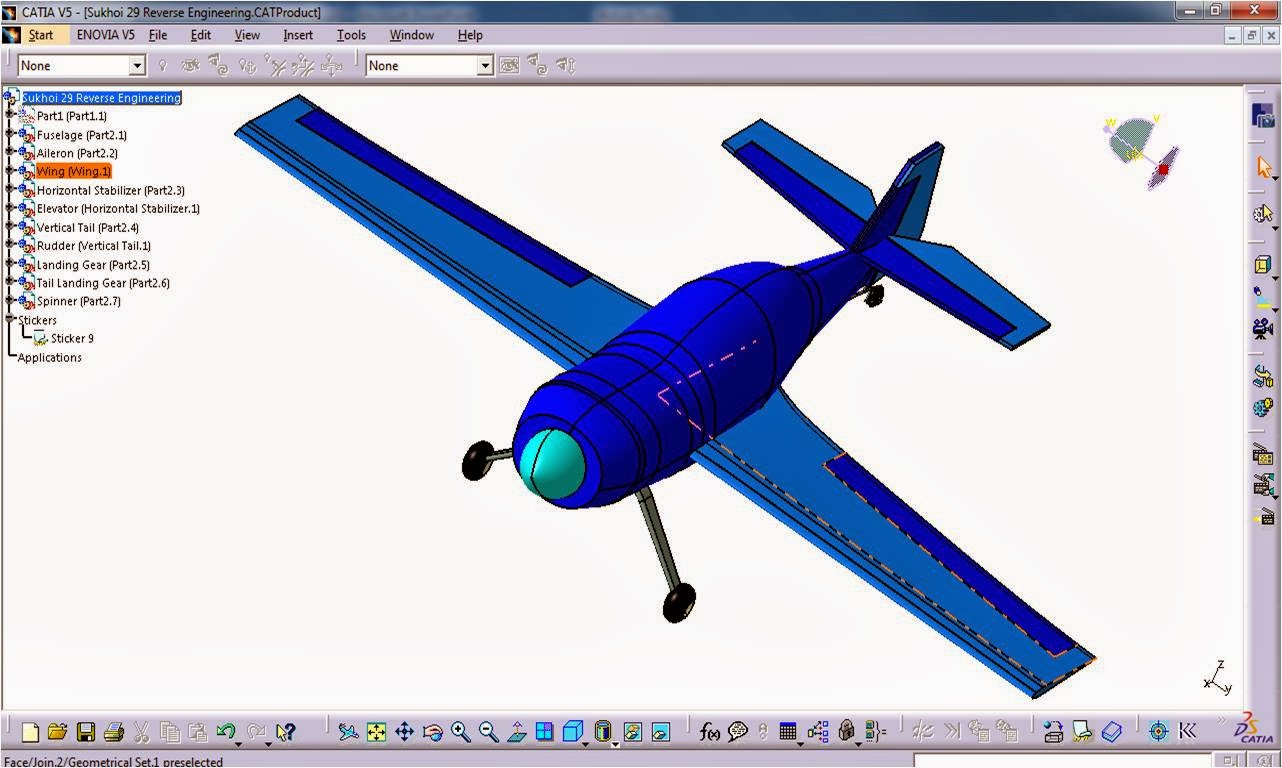
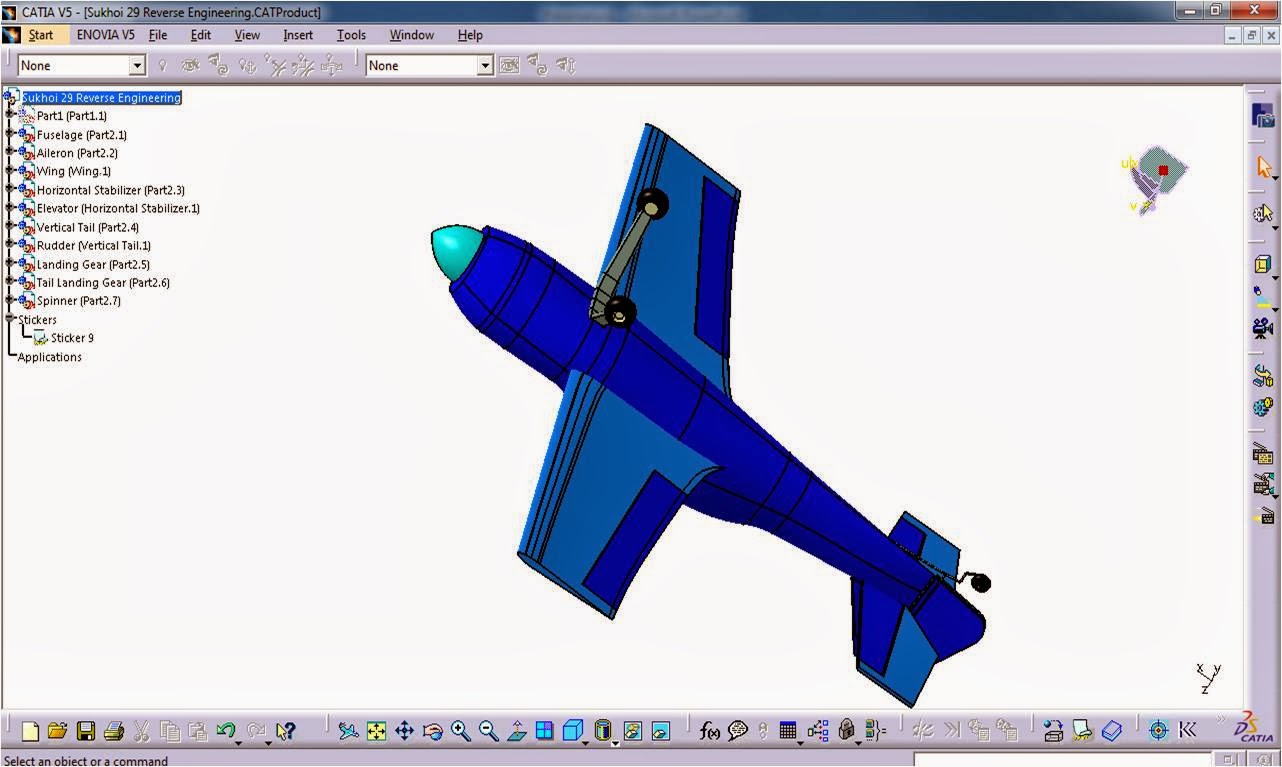
And i also have done the CATIA REVERSE ENGINEERING on SUKHOI 29 as in pictures below. Feel free to comments on my comments on the bottom of this page.
Learn how to do this in CATIA, click HERE to go to the first tutorial on building Sukhoi 29.
Tuesday, January 15, 2013
Cessna 172 Skyhawk
Assalamualaikum wbt,
Today, i would like to share with you guys a great video as above.
It is a tutorial with CATIA V5 for Cessna 172 Skyhawk. This is a great 7 minutes tutorial that have made based on my B747 Tutorial video and contains few functions in CATIA V5 such as Surfacing, Kinematics and Analysis. And i am very gratefull to the author of this tutorial to produce such a tutorial in small airplane.
Congratulations and i hope others will love to see this.
wassalam
r/
zihad
Wednesday, February 23, 2011
B747 400 Reverse Engineering Tutorial with CATIA V5
Salam,
As i ve promised, here i show to all of you, tutorial on how reverse engineering with catia v5 for Boeing 747 400 commercial airplane. This method of reverse engineering only requires 3 view plane (top, side, front) as a datum reference to do the 3D modelling.
This method is not to accurate with only 80% accuracy and it has lost high accuracy on the detail area. But, a higher accuracy can be obtained by acquiring image that are in high detail such as detailed drawing plan.
This method requires user to use different workbench in CATIA v5 that are Wireframe and Surface Design, Photo Studio and Assembly workbench. I have done this tutorial using this three workbenches.
You can surf to these videos step by step, but unfortunately, some of the video cant be played in the youtube because of its objection on the video that are more than 15 minutes. so these video cant be viewed for now. InsyaALLAH, when i have time, i will split it to make it less than 15 minutes.
Click here for the images link. thanks to the website for the images.
Sunday, October 10, 2010
Sukhoi 27 Flanker 3 Plan view Reverse Engineering
CATIA V5 R19. 2 days work on Reverse Engineering, design on wireframe and surface construction specialization.
I ve downloaded su 27 k diagram below. as usual, we need 3 view of the diagram that is side, front and top or bottom view.
I ve downloaded su 27 k diagram below. as usual, we need 3 view of the diagram that is side, front and top or bottom view.

Then, those three view picture is cut out using picture editor such as microsoft photo manager. This software is the best to do simple cut to the picture.
Then, 3 surfaces are created that is on the centre of the axis (0,0,0). Remind that you need to have the length, height and wing span of the aircraft so that you will have the correct size of the aircraft.

Then, using photo studio workbench, use add sticker, (icon with sticking paper), below CATIA screen, and select picture that you need as above. Please be remind that this picture can only be viewed with SHOW MATERIAL shading, below CATIA window.

Above is the side view of the airplane. In this method, ive use 3D curve to sketch the nose, wind screen @ cockpit, fuselage through the engine. Then, ive created points along the 3d curve.
3D spline are used to create the cross section of the fuselage from nose to the engine. Loft method have been used to loft the fuselage from nose until the engine. Before that, take note that i only made the surface of the left side of the airplane. my idea is, to apply symmetry to the create the surface.
 This is the front view of the airplane. You can see that the airplane have been made symmetrical and you can see the continuation of the tangency on the connections.
 As you can see, the tail have it different angle on the tip of the horizontal tail. Ive made angled plane, and airfoil sketch is created before the loft method is used to create the tail.
Below is the pictures of the finished airplane without any stickers on the airplane. Below is only the surfaces that ive changed the standard yellow colour of the airplane.

Here i show you, the wireframe of the airplane once we selected the wireframe shading. As you can see, the wireframe is used by CATIA to create the surfaces that we developed.


Below is finished su 27k. I am very very satisfied what i ve done in this project. Ive put sticker (same as above method) to the airplane. I also locate Russian Star logo on the wing and the vertical tail. Ive also put stickers on the engine.


Here ive finished my project doing a reverse engineering on Su 27k. This is an interesting project that i ve ever finished before on wireframe and surface design PLUS reverse engineering method.
check my b747 tutorial here and Dassault Rafale from france here. Using the same method as done in this post. happy learning !
any catia job need to be finished? click here
zihad
CATIA V5 Specialist
Malaysia
Subscribe to:
Comments (Atom)